Pages

Saturday, February 23, 2013

Rosepath Scarf

The scarf with the "Soft Plum" weft is finished and I am just starting on the second scarf which will have "Ginger" as the shade of its weft and a rosepath design in both the threading and the treadling.

Again it is basically a four shaft draft expanded to fit 20 shafts and 16 treadles with extra shafts and treadles for basket weave hems and selvedges.


Monday, February 18, 2013

Basket Weave selvedges on 4 shafts

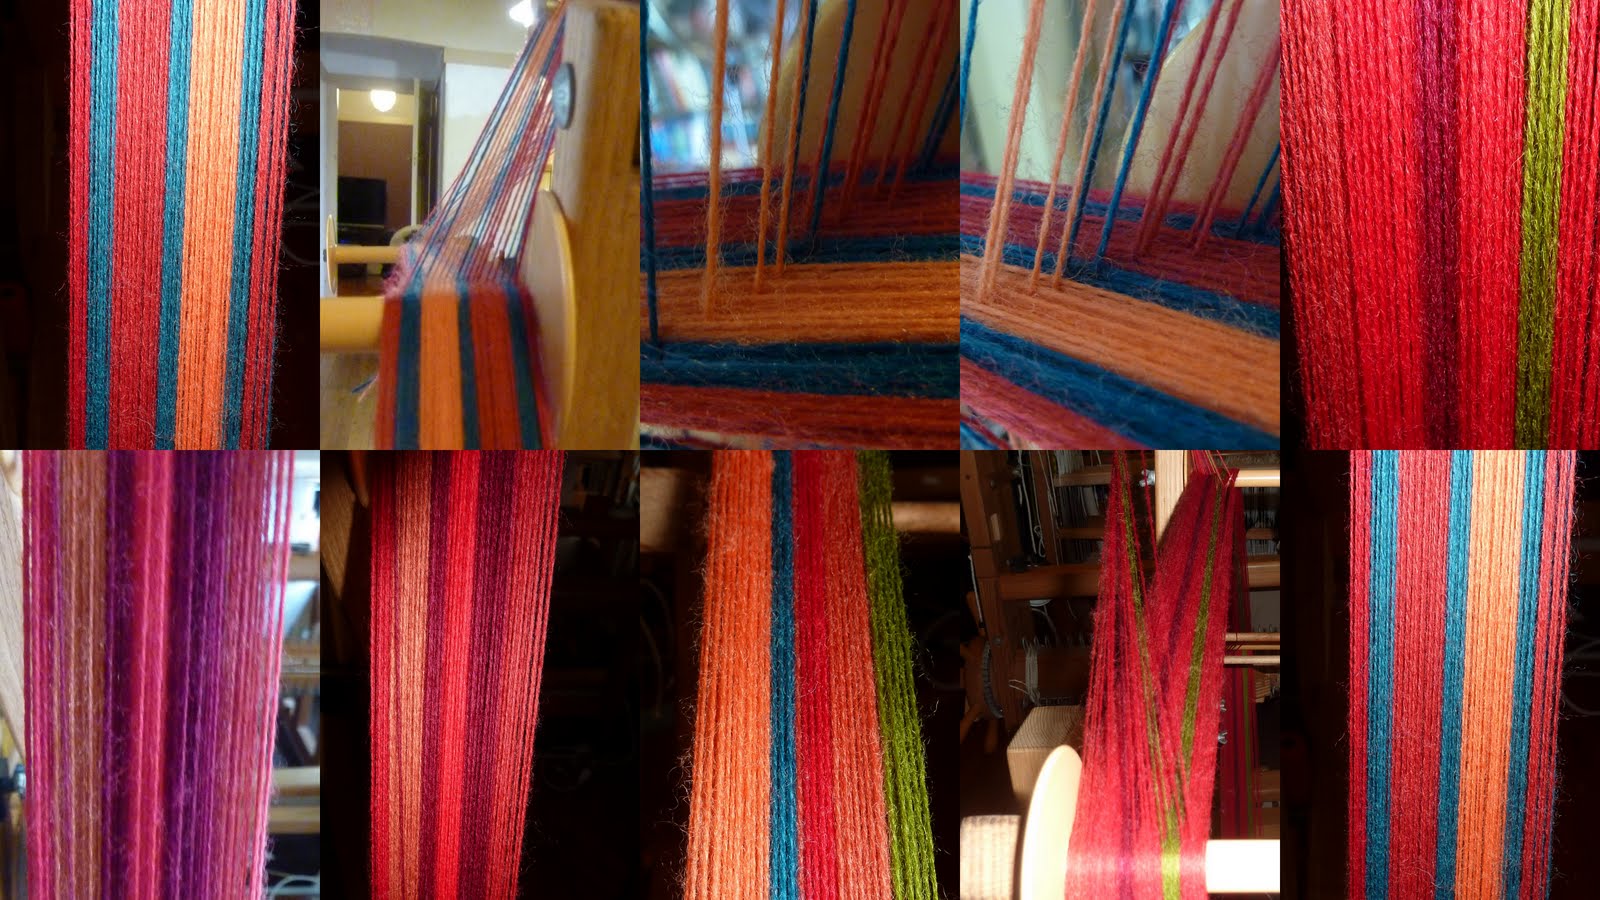
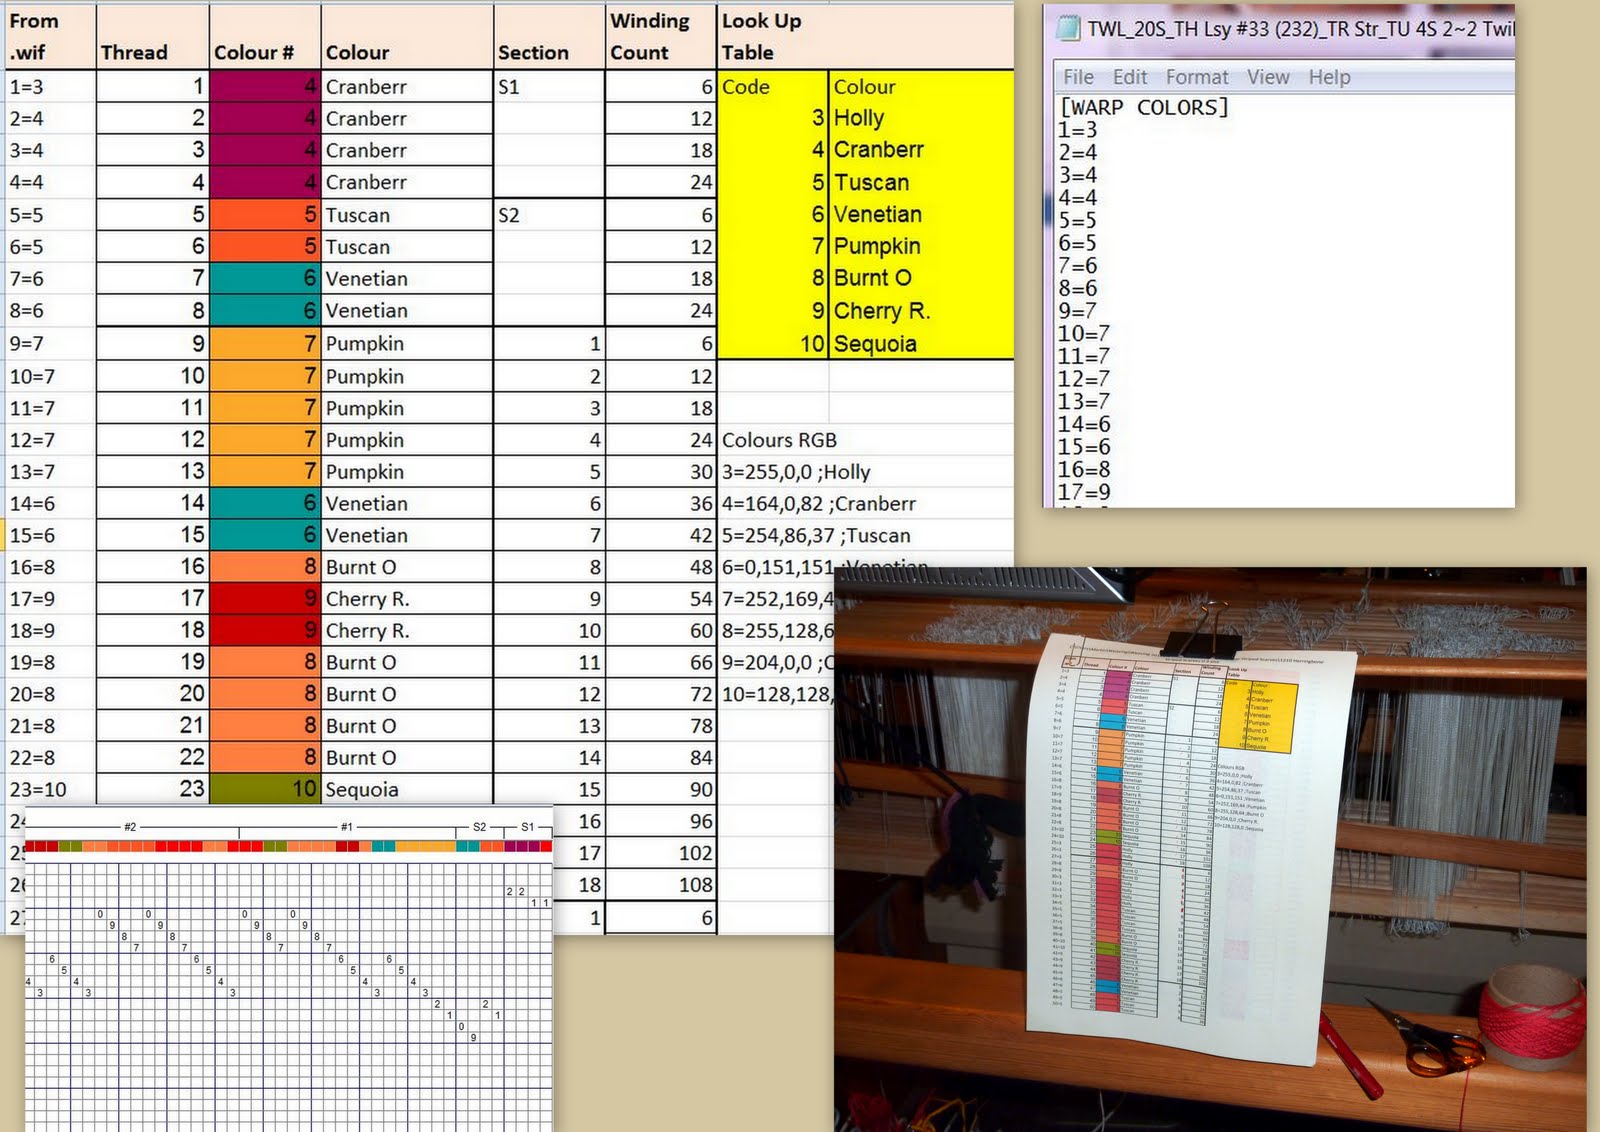
In my last post "We are off" I was talking about a herringbone scarf that I am weaving on a 24 shaft draft. I am using this threading because that is what was on the loom and tied on the new warp. This is the draft;


The weaving software that I use is PixeLoom which has an "Optimise Draft". When applied to the draft I get this;


When I consider how I derived the tie up for the 20 shaft (discounting the selvedges) draft I shouldn't have been surprised. The tie-up is Four Thread Herringbone  (Marguerite P.D. p 25) with the threading straightened to 8 shafts and this was then used to create a 20 shaft tie-up. Optimising the draft restores the original herringbone threading.

And as always when considering anything to do with 4 shafts it has almost invariably already been documented by Marguerite P. Davidson! 

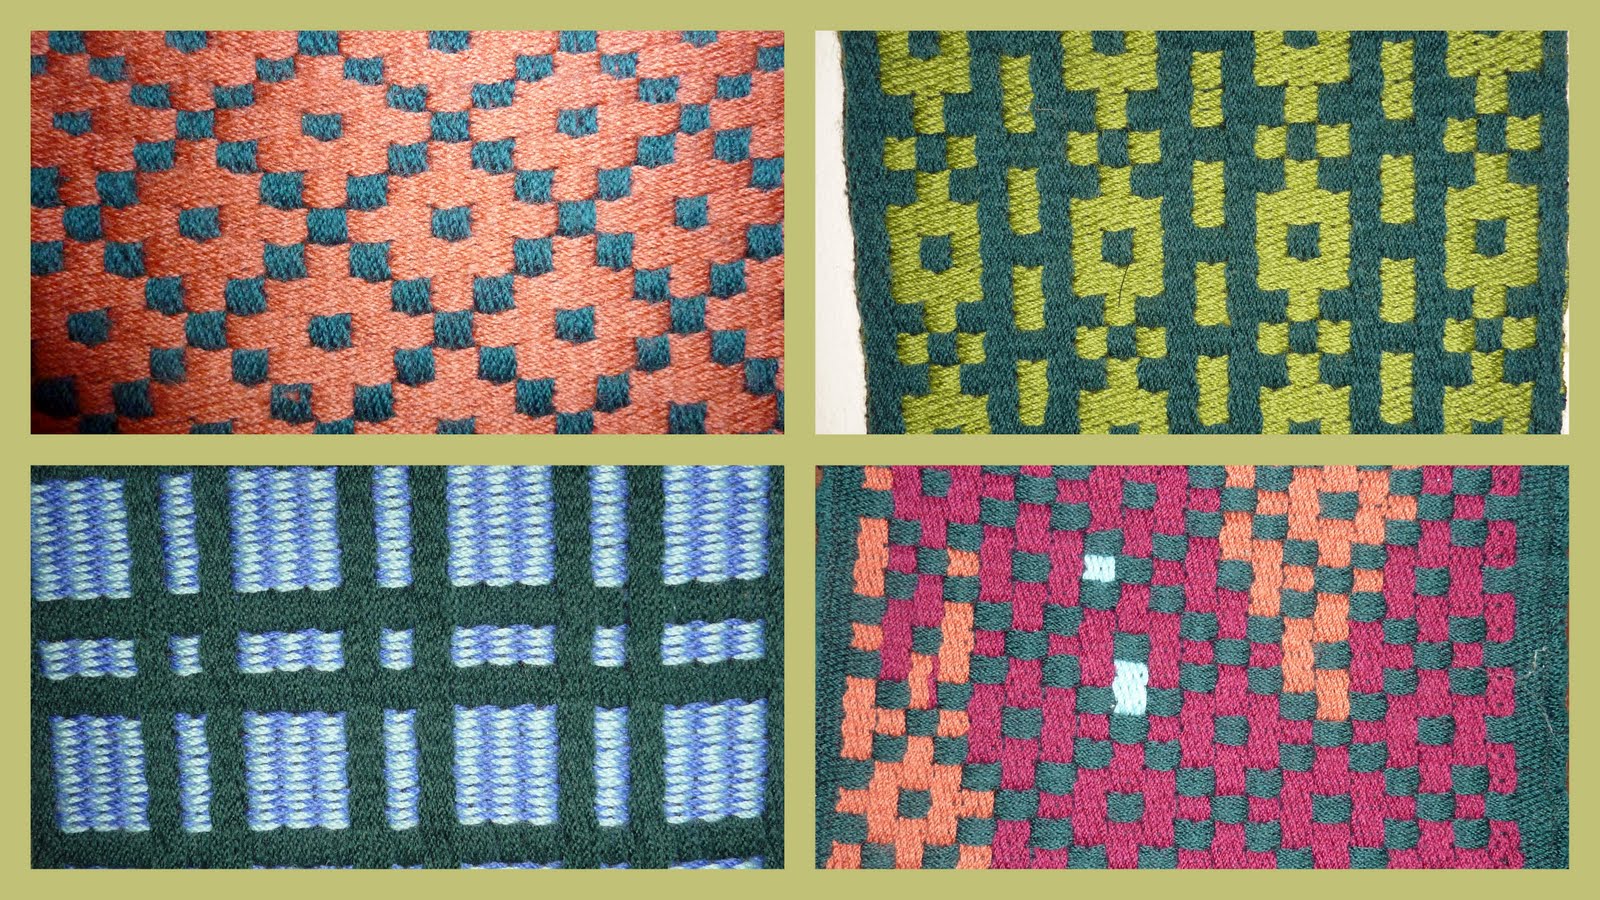
Basket Weave & Herringbone - MPD page 49


As long as the tie up is for a 2/2 twill and the treadling is straight this will work for any 4 shaft threading; just thread up a bit of basket weave on each side, using odd shafts on one side and even on the other. 

Wednesday, February 13, 2013

We are off!

Having tied on a new warp (see previous post) I was expecting to have to re-tension it. On spec I put in a couple of picks of tissue paper and to my surprise (and delight) I found that the tension was OK. I sampled several weft colours and battled with a dodgy selvedge on the right hand side. I spent some time adjusting the tension of the warp, the different tensions of the selvedges (weighted separately) and the tension on the end-feed shuttle. I found that by having less weight on the right hand selvedge than the left hand one the problem was sorted.


I finally settled as "Soft Plum" for the weft colour of the first scarf.


The pattern is herringbone with basket weave selvedges (thank you Sandra Rude) and a bit of basket weave at the start and finish.  The draft below is what I am weaving because of the threading that I have tied on to but in fact this could be woven on four shafts!


Sunday, February 10, 2013

Tying on a new warp

I have tied my new warp onto the warp that I left on the loom from the previous project. The last time that I did this I tied on in front of the heddles  (http://gangewifre.blogspot.com.au/2010/05/tying-on-new-warp.html). This time I followed the excellent instructions to be found on Peggy Osterkamp's Weaving Blog (http://peggyosterkamp.com/100-great-weaving-tips/)


The only deviation from the script is the lilac yoga brick with a knitting needle stuck in the side and held steady by a small weight. I used this to help me position and tension each knot. I formed the knot around the needle and then slipped it off.

  • Top Left shows the set up. There are two broom sticks running from the back beam to the front beam with a plank resting on the top. My plank is a bit rough so I have put a tea towel on top. The new warp comes up over the back beam, through its lease sticks and over the plank. Each one inch bout is held taut by a small weight which dangles own from the front edge of the plank (not visible). The old black warp emerges from behind the heddles, goes through its lease sticks and rests on the plank.
  • Top Right shows the two warps approaching each other through their respective sets of lease sticks and held firmly in place by a small weight attached via a snitch knot. This is the the action area where the two warps are tied together with a square knot.
  • Bottom Left shows the new warp at the back beam.
  • Bottom Right shows the area where the two warps have been tied together  The knots have been advanced through the heddles and reed to just behind the front beam.
I would say I spent as long as I would have done threading the warp but I took my time and checked everything very carefully. It took me a while to work out the optimal positioning for the two warps and how to secure the ends in place before tying them together. I also took a lot of photos for a record for next time. Towards the end I really speeded up and I am sure that  this it will prove to be a real time saver the next time I do it.

This is the second time hat I haveI


Thursday, February 7, 2013

Winding a multi-coloured warp


I have just finished winding an 18 yard warp for a series of twill scarves. The colour scheme is based upon the front cover of "The Handweaver's Pattern Directory" which I first tried to analyse about three years ago. It isn't an exact match as I am using my existing stocks of Bendigo 2ply. Once I have used this I can't repeat it because Bendigo Woolen Mills have severely reduced their colour range in 2 ply, which is a great pity.


I used my AVL warping wheel, sometimes it is a pity to take the warp of the wheel -  the stripes of colour look so good!


Because there were frequent colour changes I put together a spreadsheet which gave me a precise guide as  to when to change colour and when a section ends. The raw data came from the .wif file of the draft to which I applied some formulae and conditional formatting.


Friday, February 1, 2013

Warp & Weft faced Lampas - part 3

The Warp & Weft Faced Lampas is finished and off the loom. The cloth is much better for coming off the loom and being washed; it looked decidedly ropey when on the loom. I am happy with the result and would probably want to use this structure for furnishing fabric.

 I had great fun with the fabric at the bottom right where I used  discontinuous wefts which were interlocked under the warp floats. It took a bit of fiddling to get it right - you must be true to your shed!

A first for me was that I used a sewing machine to hem the samples. My wife gave me a quick tutorial and then I was off! Now that I have this knowledge the next time that I weave a sample I shall make it large enough to be turned into a bag or something else useful.

I also wove a "tapestry" on the same warp. Over Christmas I was separated from my looms so I did a small needlepoint to the same design.  I have an idea that I might be reusing these colours in some other work.