Pages

Sunday, November 20, 2011

Toika Control Unit onto a Glimakra Standard - Nearly finished!


It has been a busy week at work and the lovely weather this weekend lent itself to tennis,cycling and a bit of swimming. In spite of all these distractions I have virtually finished the installation - I just have to do a bit of adjustment of the harnesses and then I am ready to thread, sly and weave as I already have a warp sitting on the back beam.

I finally got the harnesses finished on Friday evening and have been hanging them over the weekend. It was just a case of follow the instructions and try to get everything as level as possible from the outset. I have a small spirit level that sits on top of the shafts and I got all the shafts sitting neatly on two broom handles before I tied them up.

There was one slightly hairy moment when the weight of the shafts pulled the control unit across to one side - hence the two pieces of crenelated wood that can be seen in one of the pictures [they are the shaft holders that I won't be needing any more].


I had previously loaded the WeavePoint software onto a laptop and it was a matter of minutes to connect the unit up to the power and the computer and, hey presto, it all worked  first time, immediately!  I pressed the peddle and shafts moved up and down according to the draft so I poured myself a cold beer and that's it for this weekend. Brilliant!


Monday, November 14, 2011

Toika Control Unit onto a Glimakra Standard - Day 2

Nothing very exciting today; just putting the harnesses together. You start of with this;


and end up with 24 of these;


The way that the harnesses are put together is quite neat - rubber "O" rings that fit into indentations on the metal rods that connect the top and bottom heddle bars at each side and hold it all nice and snug. Much less stressful than the methods where the bottom heddle bar just dangles on the heddles. 
I did 12 harnesses tonight so I should be able to knock the rest off tomorrow.


Sunday, November 13, 2011

Toika Control Unit onto a Glimakra Standard - Day 1

The story so far...yesterday I unpacked  the parts of my new Toika EW24W Computer Control Unit. Today I start fitting it to my Glimakra Standard.

The first job was to remove everything to do with the jacks, shafts, lamms and treadles on the Glimakra. A bit of a pity as it took me an age and a lot of effort to put it all together in the first place. The end result of all this work was a table covered in sticks and string and an empty loom.


The computer unit sits on two rails that that fit across the top of the loom and rest on the castle at each side just behind the beater assembly. The instructions are precise as to their orientation and they fitted exactly.


Having done that the pulleys have to go on. There are three sets of 24 pulleys which are mounted on three rods which are threaded through holes in the rails an held in place by cotter pins. Again I just followed the instructions.


.
As the photos below show the two sets attached to the right hand side of the rails. There is another set on the left.


Once the pulleys are in place on their rods the rails are at the correct distance apart to receive the control unit. This lifting up and positioning was a two person job but straight forward. The unit sits neatly on top of the rails.


There holes on the bottom of the rails that probably align with holes on top of the castle for Toika looms so that a dowel peg can keep the rails in the correct place on the castle. They didn't align with any of the holes on the Glimakra because I have the front rail tight up against the beater assembly. However a hole just behind the back rail took a peg which will stop the rails from moving.


I think that this position will be OK but it isn't I will just have to adjust it later on. The aerial view to the left shows how it all fits snugly together.

That it for today. Tomorrow evening after work I will start putting the harnesses together.

Saturday, November 12, 2011

Toika Computer Control Unit

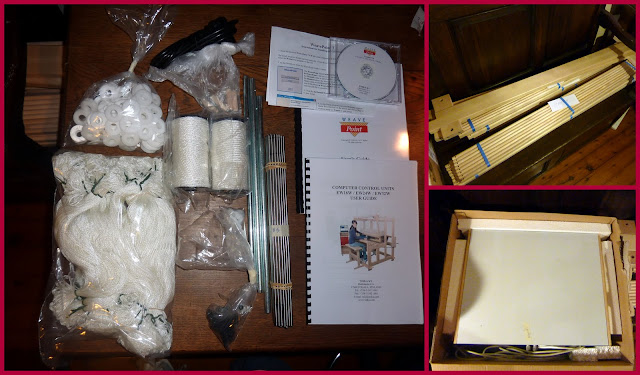
After a journey from Finland to Australia, a journey of about 10,000 miles for an energetic crow but longer by boat, my Toika EW24W has arrived. I combined the order with Liz and she did all the messing around to get our boxes through customs and quarantine - quite a palaver for her.

So far all that I have done is unpack the parts, read the instructions and looked at everything closely to identify what it is and workout in my mind where they all fit into the great scheme of things.


There is one problem that I need to address first. As I have been using my AVL recently the Glimakra Standard to which I am going to fit all this has become a bit of a dumping stand. Clearing all of this stuff and finding homes for it will be the first job for tomorrow.

Sunday, November 6, 2011

Novelty Yarn Scarf

I have started weaving the Novelty Yarn scarf that I referred to in my previous post. I started off weaving it as plain weave but the problem was that the eyelashes of the weft became trapped under the warp. I have changed to weave to Brighton Honeycomb which gives me some longer floats to let the weft show itself off. It looks rather like slightly hairy chain mail at the moment but I am sure that with wet finishing and a bit of tweaking I'll get it looking suitably furry.